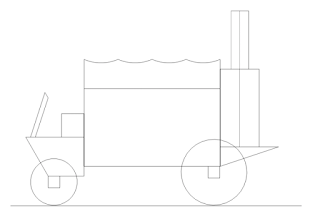
I start with a rough sketch, figure out some shapes and dimensions and use those as a guide for the 3d version of the model. I don't usually put much detail into the 3d model as it's not headed to a 3d printer and I just need the building blocks, details and texture come later.
I then export from my 3d program to Pepakura to unfold the shapes, export from that as an eps file into either Canvas Draw or Photoshop. Canvas Draw has some handy features that can speed up some of the edits when it comes to duplicating, editing, and rearranging pieces. I try to organize the pieces in pages with this step of the layout.
It looks like it's about five pages worth of material with some wiggle room if I want to reduce the page count or add in some small extra bits. Then it's off to Photoshop to organize into pages and start texturing. This is the longest part of the process and is usually two days work per page, sometimes more, rarely less.
Each pieces-parts gets it's own layer workgroup withing the page. Above those groups are layer effects that affect the entire page; overlay clouds, levels adjustment layers, gradient overlays, etc. Once I see how the pages are filling up in Photoshop I think about what else I could add in to use up white space and enhance the model, in the case of this page I decided more destination signs would be fun. I still have room for four more destinations, still thinking what they could be.
Texture, texture, texture, days of it.
Then I print everything out and do a test-build of the textured piece. I sometimes do white model test-builds, but those are mainly for mechanical purposes if I'm not sure how something is going to go together. It's a huge help to have the physical model in my hands and turning it over and over to figure out mechanical issues.
A completed Steam Carriage! Well not quite, I've got a page of notes from this build that are all minor corrections. The biggest gaff is that the steering yoke is upside-down, which puts the yoke in the driver's crotch, not what I'd intended.
Now I've got a few hours of editing, more build pics for instructions, write the instructions, and make cut-files for ease of assembly on the next go. I also need to make a driver for this, and probably several other color versions for varieties sake.
What's it all mean? It means I'll hopefully be done with this by next weekend. :)
~Eric


Thanks for explaining the process. I never knew the hours involved. Three dimensions seems to add a whole slew of problems requiring careful consideration.
ReplyDeleteThe 3d modelling is one of the easiest parts for me, the real time crunch comes from texturing. I say days instead of hours for the work as I only have a few hours a day around my regular job to work on projects.
ReplyDelete